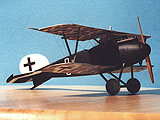
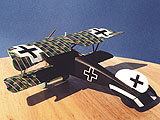
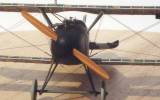
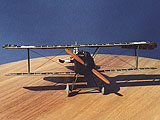
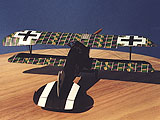
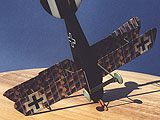
Albatros D.III O.A.W in Ray's markings
Eduard 1/48
By: Tomasz Gronczewski
Franz Ray | the model | initial
construction | external painting | final
construction | conclusions | the
gallery | links
Franz Ray
|
The man
|
|
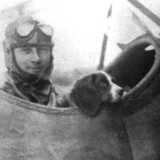
Franz Ray appeared above the trenches a few months after
German scouts lost unquestionable air superiority. He joined Jasta 1
on October 1st 1917 and scored his first kill almost two months later.
Because of unknown reasons on December 17th 1917 he was moved to Jastaschule
1 and spent there a month. On January 15th Franz Ray and an ace of Jasta
Boelcke Max von Müller were assigned to form a nucleus of new Württemberg
Jasta 28. Despite Jasta 28w was engaged in heavy fighting over Flanders,
Ray failed to score until September 1917. But then his scoreboard started
to rise rapidly. On September 23rd Ray joined acehood and in November
his score stood at nine kills.
In late 1917, shortly after USA had entered the war, Germans
decided to change their defensive strategy and to restore air superiority
by doubling number of Jastas from 40 to 80. This enterprise was called
“Amerika Programm”. On December 23rd 1917 Jasta 49 was founded in Cottbus
as one of the second run of Jastas. Franz Ray was nominated as a commander
of the new outfit. Initially whole Jasta was equipped with obsolete
Albatros D.IIIs, but later the outfit was re-equipped with agile Fokker
D.VIIs.
On March 27th 1918 Ray scored first victory for the Jasta
(his 10th), and by the end of the war whole Jasta had been credited
with 28 victories. This tally was achieved mainly thanks to three outfit’s
aces: Ray (8 victories scored with Jasta 49), Brandstein (8) and Habich
(7). Franz Ray remained a commander of the Jasta until the end of war,
but in October he was temporarily moved to Germany to test new scouting
aircraft. He did not return to the Jasta before the end of the war.
After Ray’s departure Lt. Habich was acting as a deputy commander.
|
|
|
and the machine
|
|
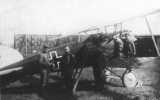
Ray’s D.III belonged to late production D.III series manufactured
by Ostdeutsche Albatros Werke located in Schneidemuhl (now north-central
Poland). O.A.W. built Albatros scouts were equipped with distinctive
curved rudder which proved to be so effective that became standard feature
in all subsequent variants. Except of that Ray’s Albatros carried small
airfoil mounted to the undercarriage axis and telescopic gunsight.
Although Jasta 49 was known to carry rather colorful markings
with distinctive snake wave motives, Ray decided to paint entire fuselage
of his Albatross with uniform dark, probably black color.
|
Franz Ray’s scoreboard
|
1.
|
Nov 23rd 1916
|
Pup (N5190 of 8 RNAS)
|
Haplincourt
|
Jasta 1
|
|
2.
|
Sep 10th 1917
|
Camel
|
NW Houthulst Forest
|
Jasta 28w
|
|
3.
|
Sep 16th 1917
|
Camel
|
NE Dixmunde
|
Jasta 28w
|
|
4.
|
Sep 20th 1917
|
R.E.8
|
Zillebeke Lake
|
Jasta 28w
|
|
5.
|
Sep 23rd 1917
|
Camel
|
N Nieuport
|
Jasta 28w
|
|
6.
|
Sep 24th 1917
|
Camel
|
Ramscapelle
|
Jasta 28w
|
|
7.
|
Oct 14th 1917
|
Spad
|
Stuivenskerke
|
Jasta 28w
|
|
8.
|
Nov 8th 1917
|
R.E.8
|
Keiem-Stuivenskerke
|
Jasta 28w
|
|
9.
|
Nov 28th 1917
|
F2B
|
SW Dixmunde
|
Jasta 28w
|
|
10.
|
Mar 27th 1918
|
R.E.8 (16 Sqn RFC)
|
Albert
|
Jasta 49
|
|
11.
|
May 27th 1918
|
R.E.8 (52 Sqn RAF)
|
Meteren
|
Jasta 49
|
|
12.
|
May 30th 1918
|
Dolphin
|
Nieppe Forest
|
Jasta 49
|
|
13.
|
Jun 28th 1918
|
F2B
|
Albert
|
Jasta 49
|
|
14.
|
Jul 1st 1918
|
S.E.5A
|
Villers Bretonneux
|
Jasta 49
|
|
15.
|
Jul 4th 1918
|
S.E.5A
|
Villers Bretonneux
|
Jasta 49
|
|
16.
|
Jul 16th 1918
|
Spad
|
Tahure
|
Jasta 49
|
|
17.
|
Sep 30th 1918
|
Spad
|
Somme-Py
|
Jasta 49
|
Sources:
The model
The new Eduard’s D.III kit looked so good in the box, and I had
read so many superlative reviews about it that I decided to build a short series
of three kits. Each kit had to represent totally different markings. After I
had finished the first kit, Voss’ early D.III, I started preparation for the
second: very late OAW built D.III flown by Franz Ray.
List of Ingredients:
-
a 1/48th Eduard kit Albatros D.III Profipack (kit no. 8035)
used as a basis
-
an additional 1/48th Eduard P/E set for Albatros D.III (set
no. 48 263) used to replace many kit’s parts
-
a 1/48th Eduard kit Albatros D.Va Mailed Gauntlet used as
a source of upper lozenge decals and wing crosses.
-
1/48th Techmod five color lozenge decal as a source of bottom
lozenge decal
-
various sprues used to replicate various details
-
brass rod used to replicate construction pins of the undercarriage
legs and for radiator piping
-
0.06 and 0.08mm fishing line used for rigging
-
CA glue Super Attack used to glue virtually everything
-
White wood glue Uhu used to attach windscreen
-
tacking mass Uhu used for masking
-
Tamiya masking tape used to simulate leather seat upholstery
and for (surprise, surprise!) masking
-
Custom vinyl masks used to paint crosses on fuselage and tail
-
Thin vinyl foil used to make rib tapes
-
Citadel Colour White Undercoat a white spray meant for priming
white metal RPG figures here used to prime some details
-
Humbrol enamels thinned with Testors airbrush thinner to perform
basic paintwork
-
Aeromaster white and black acrylics used to paint insignias
and various details
-
SnJ aluminum metalizer used to simulate natural metal effect
-
Testors metalizers used to paint guns
-
Pebeo artist oils thinned with turpentine used to apply wash
-
Brown and white colored pencils used to simulate wood grain
-
Various brown Tamiya acrylics used to simulate wood grain
-
Lego bricks used to build construction stand
-
Future Floor Wax used for all varnishing activities and during
decal application
-
Aeromaster Flat Clear used together with Future for final
coating
-
Microsol used for decal application
Initial construction
Interior:
Although I had an extra P/E set with many replacement brass parts
I decided to build interior according to simpler Profipack receipt. Usage of
P/E set would make cockpit construction much more sophisticated and would not
provide me with serious advantage. On the other hand P/E fret included in Profipack
provided most vital brass details.
I painted wooden parts with Humbrol 121. After they dried I marked
wood grain with brown colored pencils and thinned brown Tamiya acrylics. Finally
I sprayed everything with mixture of Tamiya Clear Yellow plus a bit of Tamiya
Clear Orange.
Ammo drums were sprayed with SnJ.
All metal parts were sprayed with Humbrol 31 gray green and received
a thin coat of Future to break matt appearance.
Control stick handles were painted with Humbrol 110 and overcoated
with Tamiya Clear Yellow + Tamiya Clear Orange mixture.
Then I applied light wash of Pebeo sepia artist oil paint and
light drybrushing using Tamiya matt Buff.
Finally a few touches of Testors Chrome Silver and Aeromaster
Flat Black added necessary details.
Engine:
Entire engine was sprayed using Citadel Undercoat and then with
SnJ. Then upper part was brush painted with Aeromaster Flat Black. Finally entire
engine received light Pebeo sepia wash and was drybrushed slightly with Testors
Burnt Steel metalizer.
Exhaust collector was sprayed with white Citadel Undercoat, brushed
with Testors Burnt Steel and received ample wash of various brownish and reddish
Pebeo tempera water colors. Air feeding system was attached to the engine in
this stage while exhaust had to remain yet unattached.
Fuselage:
Having components ready I glued them into their places. When I
was building my Voss’ kit I realized that it was better for gun supporting frame
to be attached after fuselage halves had been glued. So this time I left it
as before.
After I had glued both fuselage halves, I sanded it overall to
hide joint butt and to remove all inspection panels. Then I rescribed some lost
panel lines.
In order to facilitate future rigging, I drilled four parallel
holes on the each board just above the place where the bottom wing was supposed
to be glued later.
After final sanding and polishing I attached replacement P/E panels.
Later, after painting entire fuselage with black I noticed that it was really
a little sense to replace all panels. It would be enough to replace bottom details
and plates strengthening cabane struts.
BTW, note that attaching points of cabane struts are molded incorrectly:
the rectangular plates with central holes should be attached BELOW strut attaching
points, not around them. This is one of the reasons why to replace them by P/E
parts.
After fuselage was ready I separated elevator from horizontal
tail piece and attached both horizontal stabilizers to the fuselage. Then I
attached bottom tail skid pod.
Finally I re-drilled all struts and legs attachment holes to facilitate
future construction.
Top wing:
As I had decided to reposition ailerons significantly this time,
I had to remove them completely and to glue them back. While doing that I noticed
that when the left aileron had been marked by Eduard correctly, the recessed
line marking the right had been mismatched. Upper line is not positioned directly
over bottom line. Everyone should take special care when attempting to separate
right aileron.
As Ray’s Albatros had lozenged wings I decided to remove radiator
from the wings and to use brass radiator taken out of extra D.III P/E set.
Radiator:
I separated P/E radiator surfaces from the fret and sanded edges
over. Top surface of the radiator was carefully bended over a big plastic tube.
The Radiator header was modified according to Steve Perry’s method
and glued to upper radiator face. Both radiator parts were then oversprayed
with Citadel Undercoat, polished and sprayed with SnJ. After a thin coat of
Future had been applied, a light wash of Pebeo artist Sepia thinned with turpentine
was applied.
Struts:
I separated all struts and undercarriage from the sprues and cleaned
them off. As I remember trouble with fitting undercarriage to earlier Voss’
D.III, I removed the construction pins from the undercarriage legs, drilled
holes and replaced pins with short brass rods.
In order to facilitate future rigging I drilled holes through
very upper ends of the cabane struts, and V-struts as well as in rear bottom
part of undercarriage legs.
Ray’s Albatros had unusual airfoil attached to the undercarriage,
and this part could be found in separate Eduard p/e set. I started to wind this
part around a file handle to give it a smooth curvature and eventually wound
up the piece around the axis. After it was glued, I sprayed it with Citadel
Undercoat and sanded it in order to improve smoothness.
All ready struts, and undercarriage parts were then sprayed with
Humbrol 31, and coated with a very thin coat of Future to reduce their matt
appearance.
Prop and skid:
Both propeller and tail skid were painted with Humbrol 121 (Light
sand) and received some colored pencil artwork. Then thin strokes of various
transparent brown acrylics were brushed over. Finally Tamiya Clear Yellow plus
a drop of Tamiya Clear Orange mixture was applied to simulate shellac. Overall
I was not happy of the result because of bad wood grain pattern that I achieved.
I think my earlier Voss’ prop was by far better.
Spandau duet:
I loved those P/E LMG sets made by Eduard. I removed front parts
of the plastic guns and attached rolled P/E grills as well as P/E handles and
front plates. Then I attached drilled plastic barrel nozzles and sprayed whole
thingies with Testors Exhaust Metalizer. Final coat of Future gave the guns
a protection and more metallic appearance. Very subtle Testors Burnt Metal Metalizer
drybrushing and very light Artist Oil Sepia wash gave the guns final appearance.
Gunsight:
Ray ordered to attach telescope gunsight to his Albatros. I scratchbuilt
it from a few stretched sprues and painted it overall black using Humbrol 85
Coal Black.
External paint job
Fuselage:
I masked an engine with Tamiya masking tape and I wish I had done
it before the engine had been mounted into fuselage. The cockpit hole as well
as the gun compartment were filled with yellow Uhu tacky mass that had been
bought in office equipment store.
The whole fuselage with horizontal surfaces attached was sprayed
with Humbrol 85 Coal Black.
Originally I hoped to use Eduard’s vinyl masks to paint white
cross outlines, but quickly I realized that they were too small. So, I prepared
a design in CorelDRAW and ordered custom vinyl mask at the street banner workshop.
I applied ready cross masks onto the fuselage and Tamiya masking
tape onto horizontal tail. Then I sealed all remaining surfaces with widest
Tamiya tape in order to avoid any reluctant white overspray. It is extremely
important when any contrasting color is being sprayed over a base. I used Aeromaster
white to apply white markings but I was a bit disappointed. Now I fill that
Tamiya acrylics are much better for masking job.
Wings:
In order to prepare better basis for lozenge decals I sprayed
wings with Citadel Undercoat and polished it using Miniplex tool (very similar
to Dremel tool but smaller and powered by low-voltage electricity). Then I wetted
wings with Microsol/Future mixture and applied five color lozenge. For the upper
lozenge I used the decal robbed out of Eduard D.V kit. But bottom lozenge of
the kit looked somehow jerky. It was simply to vivid. Thus I decided to use
latest Techmod set. During lozenge application I treated it ample with Microsol.
After the wings dried completely I painted them with Future. The lozenge decals
adhered so good to the surfaces that I was able to remove imperfections using
600 grit sandpaper. Then I made touch ups using various Humbrol colors and applied
final coat of future.
As I had had no light blue rib tapes I decided to make my own
using thinnest self-adhesive vinyl foil I had found. First I matted the foil
using 1000 grit sandpaper. Then I sprayed the foil using my own light Humbrol
RLM 76 mixture. I wanted to achieve light blue gray shade rather than rich cyan
blue color. I didn’t believe in blue/pink rib tapes theory because of their
little technological sense. So that I decided to make overall light blue tapes,
cut the foil into long stripes and applied them onto wings wrapping them around
wings.
I read somewhere that the tape was fixed at the leading edge.
So I applied tapes only on the front edges of the wings. Now I know that I was
wrong and trailing edges should be fitted with the tape as well. I have to correct
it sometime later.
I noticed that such method of rib tapes application was a few
times faster, than decal application, but anyway the rib tapes seemed to be
too much embossed. I doubt if I’ll decide to follow this way any more, unless
I will find thinner foil.
Then I applied top crosses taken out of D.V box. Bottom crosses
had to wait until rigging would have been accomplished.
Finally I gave the wings (except of bottom surfaces of lower wing
that had no crosses yet) a shot of Future and a top coat of Aeromaster Flat/Future
mixture.
After the wings dried I applied P/E radiator surfaces, glued ailerons
to the upper wing and I renewed rigging holes in the lower wings.
Vertical tailplane:
First I sprayed entire part with Citadel Undercoat, and polished
it like the wings. Then I sprayed it with Aeromaster white and finally sprayed
black crosses using custom vinyl mask.
Wheels:
According to the common knowledge the wheel disks of Ray’s Albatros
were supposed to be off-white. Looking at the photo I noticed that they were
really darker than other white elements of the aircraft. They looked just like
light blue ones of other earlier Albatri. I couldn’t find any sense in applying
odd off-white color to the real thing. On the other hand wheels looked very
fatigued comparing to the overall fresh Albatros. I assumed that the wheels
had been taken out of an older Albatros and sprayed them with light blue.
I used my own my own mixture of Humbrol 65/Humbrol 46 to match
better Methuen number.
Then I masked the disks using modified Eduard vinyl masks for
WW I wheels and Humbrol Maskol. The tires were sprayed with Humbrol 64. After
the wheels dried completely I applied a thin coat of Future to discs only and
gave them heavy wash using French Pebeo artist oil (Sepia shade) thinned with
turpentine.
Final construction
Fuselage:
After removing masking I attached ready machine guns, telescope
gunsight and vertical tailplane.
Upper wing attachment:
First I glued cabane struts, and until glue dried, I quickly dry-fitted
top wing to position struts correctly. Unfortunately or I misaligned the wing
a bit, or cabane struts were of wrong shape, and later I had to drill new holes
in the wing .5mm forward the old ones in order to mount fit cabane strut properly.
It caused additional work to remove old holes. After cabane struts had dried
completely I attached top wing with no further problems.
Undercarriage:
While doing my first Albatros kit (Voss’ D.III) I observed that
proper undercarriage alignment was worst moment. So this time I decided to prepare
a construction stand. I used simple Lego bricks to build an installation. On
the flat squared basis two towers were built to support top wing, and to prevent
its movement. Two other lower towers were built to support horizontal stabilizers.
One tower blocked the kit from the back. One long flat brick was attached just
below an wheel axis was supposed to be. The latter part helped a lot to align
visually whole undercarriage. Having such sophisticated building built I had
no problems with undercarriage alignment. After the undercarriage had dried
I applied a few reels of gray painted fishing line to simulate rubber bungee
chord shock absorber. I think that the idea was good but I wish I performed
it better.
V-struts:
Because of my rigging method V-struts had to be glued in this
very moment to the upper wing. No lower wings were attached yet.
Rigging part 1:
Before attaching of lower wings I started rigging.
First I pre-fabricated components for each rigging line. Each
of them consisted of 3 mm long turnbuckle with a long fishing line tied up.
Then I pre-painted all lines with Aeromaster black.
Then my rigging procedure proceeded as follows:
- The turnbuckle was glued into inner hole in the lower fuselage and the opposite
end was pulled through a hole in upper cabane strut (four such items were
needed)
- A plain fishing line was pulled through the same cabane strut hole. It had
to be long enough to be pulled through the outer lower wing (four such items
were needed)
- I reverted the model and put it on the edge of the table, and then I caught
the line no. r1 with self locking tweezers. The weight of the tweezers tightened
the line and I could fix the lines (r1) and (r2) to the cabane strut with
a droplet of CA glue (four such actions were needed).
- A new turnbuckle was glued into outer hole in the lower fuselage and the
opposite end was pulled through a hole in the upper V-strut. No glue was applied
yet to the V-struts (four such items were needed).
- An another one new turnbuckle was fixed to the point where rear undercarriage
leg had been glued to the fuselage. The opposite end had to be pulled though
a hole drilled in the bottom leg, but the hole was obscured by an airfoil
and I had to attach it to the leg somewhere else (two such items were needed).
Lower wing:
Attachment of the lower wings to the fuselage and V-struts was
extremely easy.
Rigging part 2:
- The plain line was attached to a hole in front fuselage and pulled through
a hole in outer lower wing and weighted with self locking tweezers. No glue
was applied to the lower wing yet (two such actions were needed).
- The line (r2) was pulled through the very same hole in the outer lower wing
like the line mentioned in step (r6), weighted with self locking tweezers
and glued to lower wing together with line (r6) using CA glue (four such actions
were needed two front lines together with line (r6), two rear lines without
line (r6)).
- The line (r4) that had been already pulled through upper V-struts were weighted
and glued (four such actions were needed).
- Tail control wire was attached inside rectangular opening in the rear fuselage,
tightened and glued to the control horn (four such actions were needed).
- Aileron control line was attached to a hole in upper wing, pulled through
lower wing, weighted and glued (four such actions were needed).
Finally all excess lines were cut using knife, and the holes were
masked with touches of appropriate paints.
Now time for the bottom insignias came.
Although top crosses were laid correctly, the tips of both bottom
ones rolled up and failed to straighten despite treating them with a lot of
water. I really started to hate Eduard decals.
Final steps:
I gave bottom surfaces a shot of Aeromaster Flat / Future mixture,
attached wheels and prop with spinner. My next Albatros scout was at last done.
Conclusions
So far I have built seven 1/48 WW I kits, two of them being Eduard’s
D.IIIs. I think that this Albatros kit is second easiest WW I kit I have approached
surpassed only by Eduard’s Pfalz D.III. The construction was trouble less except
of following items:
- gun mount is inaccurate and difficult to attach,
- it is quite difficult to achieve proper geometry of undercarriage,
- it is hard to reposition right aileron,
Now I am finishing the last of the planned D.III trio: Allmenröder’s
red scout.
The gallery
It was after I had finished the model and had taken photos, when
I realized that my cookup subject was black :o) So it is difficult to see any
details on the following pictures:
Other Cookup pages of Tomasz Gronczewski
Werner Voss | Karl
Allmenröder | cookup subjects comparison


